Summer 2025 Beauty Trends
DIY Nail Goals: Step-by-Step Designs Even Total Beginners Can Rock

May
DIY Nail Goals: Step-by-Step Designs Even Total Beginners Can Rock
Nail art has become a popular expression of creativity, and the good news is that you don’t need to be a professional to achieve stunning results. This guide is perfect for beginners looking to dive into the world of DIY nail art, whether you’re prepping for a special occasion or just want to pamper yourself at home. With the right tools and a bit of practice, you can create beautiful designs that will leave everyone in awe.
In this post, we’ll explore various styles that are not only easy to replicate but also stylish enough to make a statement. From simple patterns to colorful accents, you’ll find designs that suit every mood and personality. So grab your nail polish and let’s get started on these DIY nail goals that will surely impress!
At Home Nail Ideas: Effortless Styles to Try
Creating beautiful nails at home is easier than you think. Start with a clean slate by removing old polish and pushing back your cuticles. A fresh base coat will not only protect your nails but also help your chosen colors adhere better. Once you’ve got that down, the real fun begins with colors and designs!
Think about colors that match your outfits or your mood. You can stick with a classic look by applying a solid color or get a bit adventurous with ombre effects. With just a few tools, you can turn your living room into a nail salon!
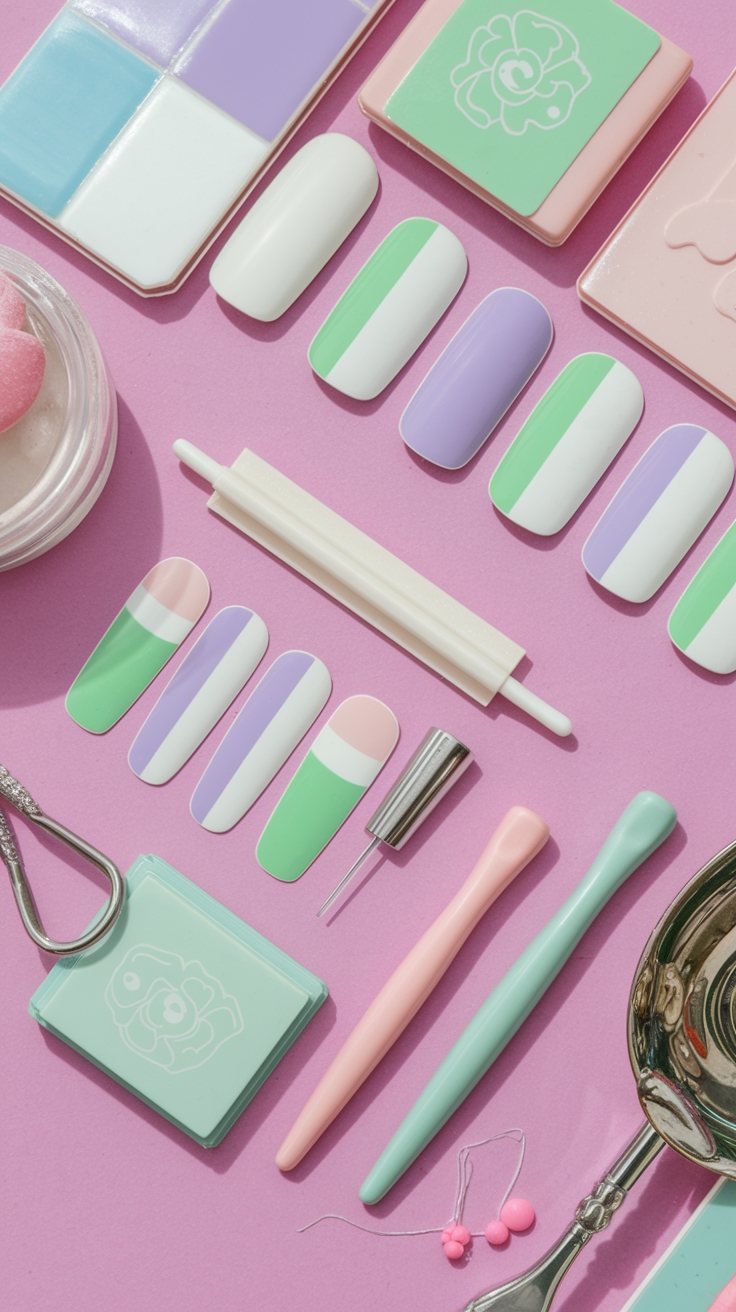
Tools You’ll Need
To achieve these at-home nail ideas, gather the essentials: a base coat, top coat, your favorite nail polish colors, and some basic nail art tools like dotting pens or nail brushes. Having everything at hand will streamline your DIY process.
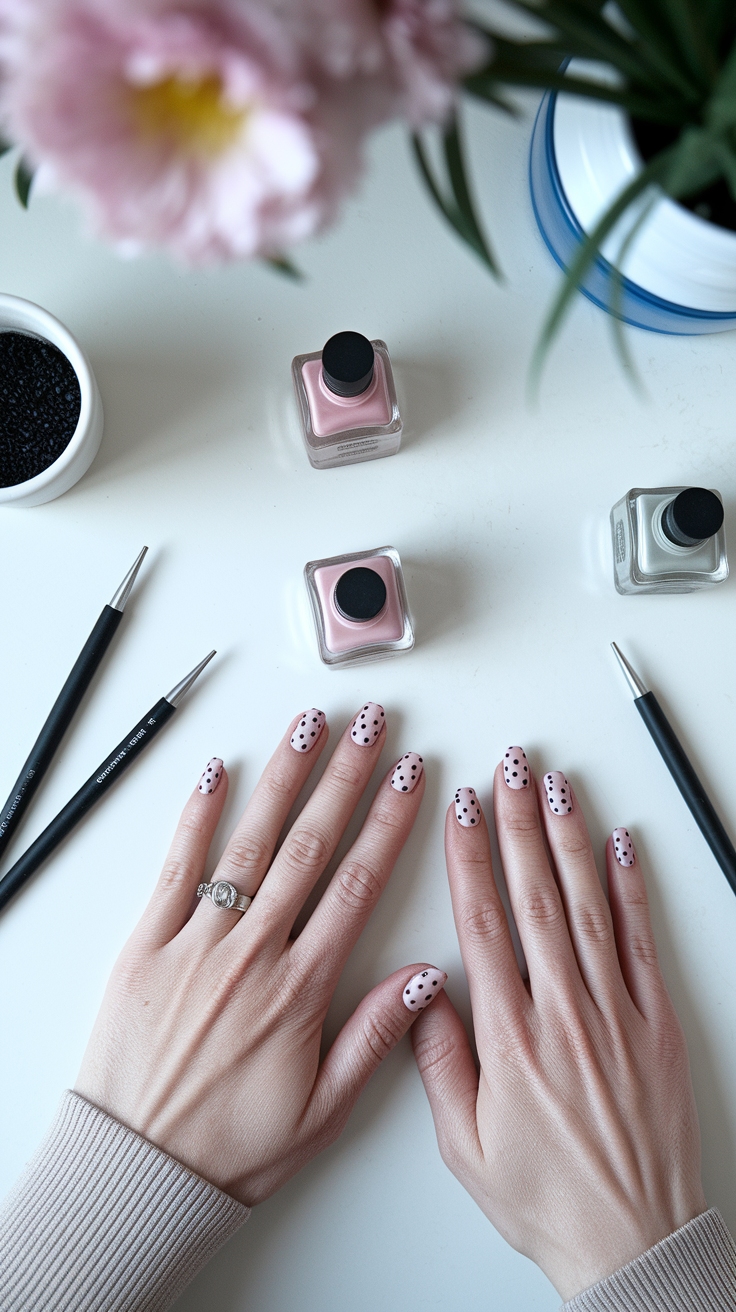
Super Easy Nail Designs for Beginners
If you’re just starting with nail art, look no further than super easy nail designs. Simple stripes or polka dots can elevate any manicure and don’t require any advanced techniques. Just apply a base color, let it dry, and use a contrasting shade to add your designs.
These designs can easily be customized to match your style. Try alternating colors or adding small gems for a touch of glam without the fuss. The key is to keep it simple and have fun!
Color Combinations
Choosing the right color combinations can make or break your nail art. Bright colors work well for casual outings, while softer hues are perfect for a more sophisticated look. Experimentation is key!
Non Acrylic Nail Ideas Short: Stylish Without Extensions
Not a fan of acrylic nails? No problem! Non acrylic nail ideas can look just as chic without the added length. Short nails are easier to maintain and are less prone to breakage, making them an excellent canvas for your designs.
Consider styles like negative space designs or half-moon manicures, which are both trendy and easy to achieve. These designs can be perfect for a polished yet low-maintenance look.
Maintenance Tips
Keeping your short nails healthy is essential. Regular trimming and moisturizing can keep them looking their best, and always remember to apply a top coat to protect your designs.
Very Simple Nail Designs Anyone Can Achieve

Very simple nail designs don’t have to be boring. Think of minimalist patterns that use simple lines and shapes to make a statement. A single stripe across a solid color can look surprisingly chic, and it’s a great way to start if you’re new to nail art.
Using tools like washi tape can help you create clean lines without the fuss. Just stick it on your nail, paint over it, and peel it off for a crisp design!
Minimalist Aesthetic
Minimalism is in! Embrace the less-is-more mentality with neutral shades and subtle designs. This can make your nails look sophisticated and timeless.
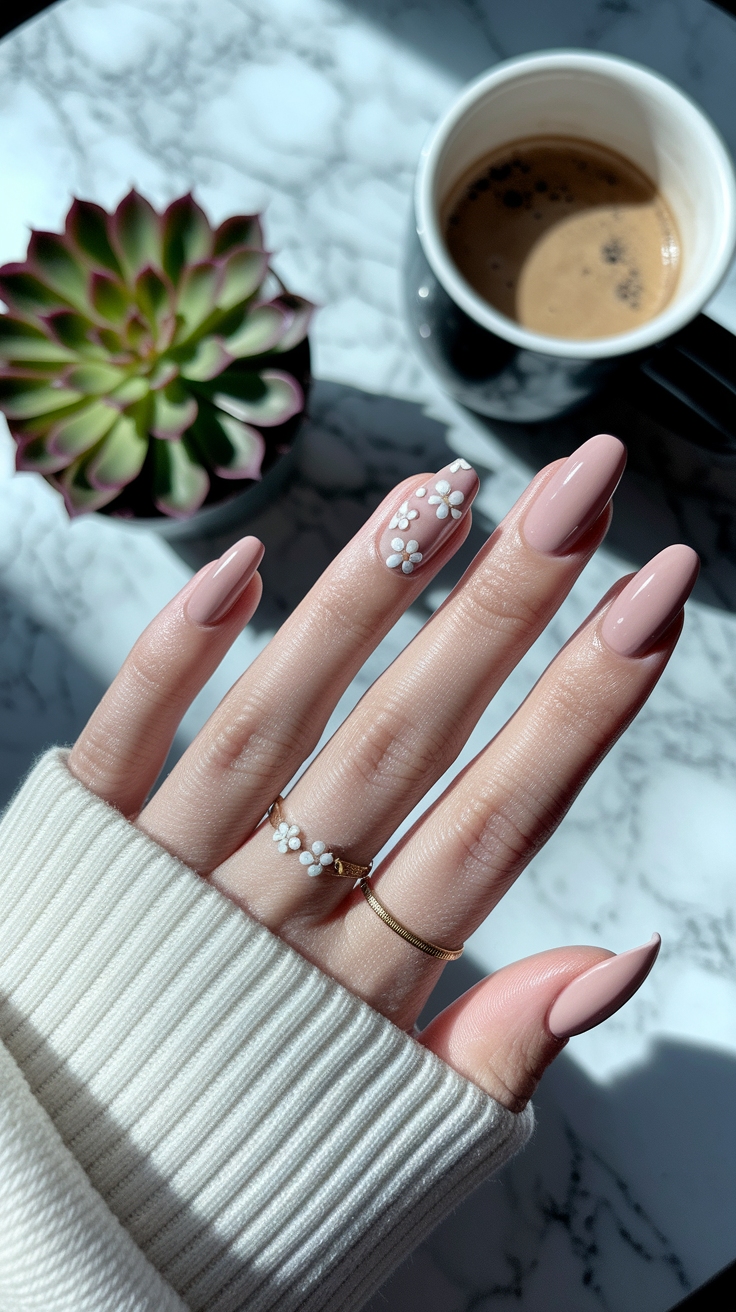
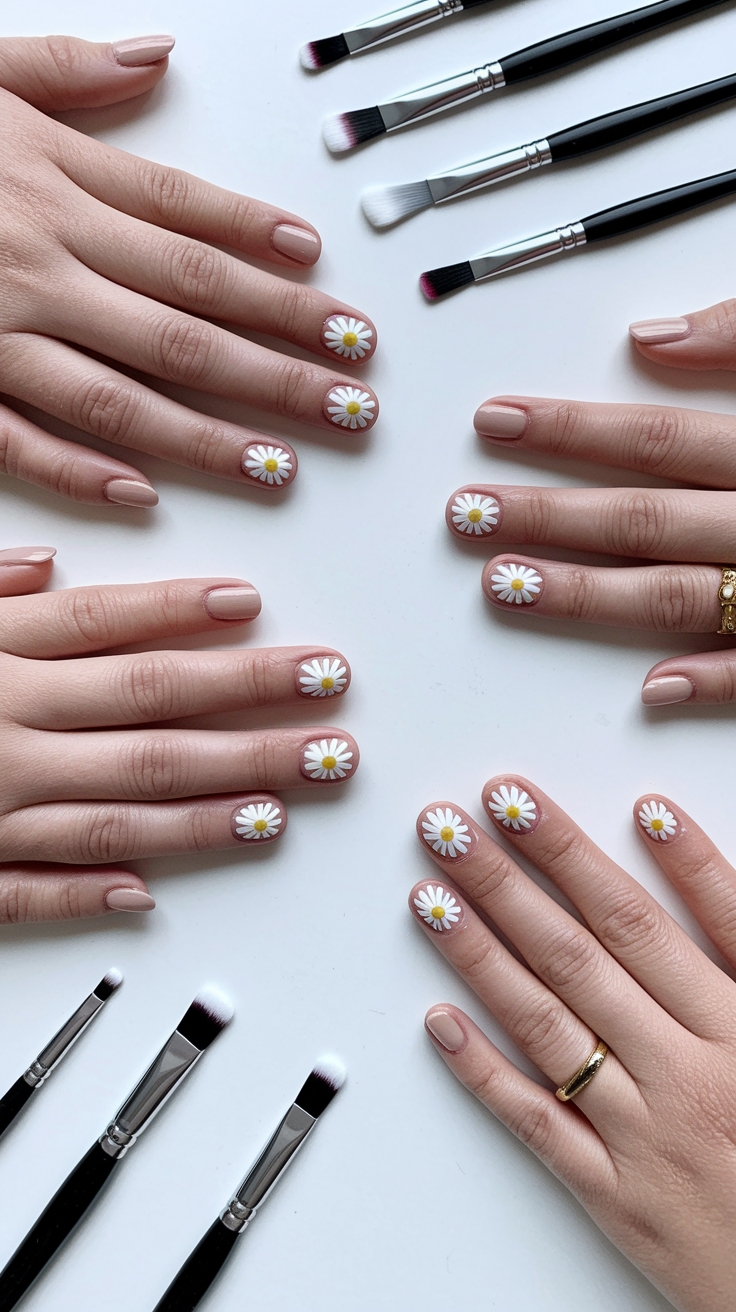
Nail Art Simple Design: Stunning Looks Made Easy
Nail art simple design can open up a world of creativity with just a few techniques. Think about using sponges for gradient effects or simple stamps to add patterns without needing a steady hand.
You can easily create floral designs or geometric shapes with a little practice. The great part about nail art is that there are no mistakes—just unique designs!
Technique Tips
Mastering a few basic techniques, like dotting or sponging, can significantly expand your nail art repertoire. Don’t hesitate to watch tutorial videos for visual guidance; practice makes perfect!
Step by Step Nail Art: Your Guide to Mastering Designs
Step by step nail art is a fantastic method to ensure your designs turn out beautifully every time. Start with a clean and trimmed nail, apply your base coat, and then move on to color application.
Follow a structured approach: paint a base layer, wait for it to dry, and then add designs in layers. This will help prevent smudges and create a professional-looking finish.
Resources to Learn More
There are countless resources online where you can find tutorials and inspiration. Don’t hesitate to explore different platforms to find the designs that resonate with you!
Middle Styling Tips for Perfect Nail Art
When it comes to nail art, preparation is key. Always start with clean nails to ensure your polish adheres well. A base coat is essential for protecting your nails and providing a smooth surface for colors. Choose high-quality polishes for better color payoff and longevity.
Don’t forget about drying time! Using a quick-dry top coat can save you from smudging your designs. Also, practice patience; let each layer dry properly before applying the next one. This will give you the best results and a salon-quality finish.
Conclusion
With these DIY nail goals, you can easily create stunning designs that express your personality. Remember that practice is essential, and each attempt will make you more skilled. Don’t be afraid to get creative and unleash your inner nail artist! Try out these designs and share your favorites with friends.
Pin this post or save your favorite look!